Saturday, 2 May 2015

mummy I want a mermaid costume....

...how could I refuse?

So after a bit of research, a bit of sketching and checking in with Grace (apparently mermaids have green tails and look like Delphi from the Tiniest Mermaid book) I came up with a plan.

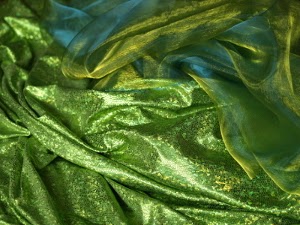
First order a heap of fabric, this is not helping me to reduce the excess fabric stash but hey, how can I turn down the girls request to be a mermaid. I found the perfect jersey, it's called snake foil but it looks pretty fishy to me. I toyed with the idea of sequin fabric but it's a pain to sew and didn't think it would actually be that comfortable for an active girl. The organza was a perfect match and I did use some of my stash of ribbed jersey.

The top was a hack of a lined shrug that I already had a pattern for. I just added an organza frill. I haven't worked with organza before, it frays horribly and is too shear to hem nicely. Instead I just folded a long strip in half and gathered it to make the frill. It makes it kind of puffy which I think is a nice effect.

The skirt is just a tube with another organza frill in the seam over the bum and ribbed jersey for a comfy waist band. The bottom is cut into a point at the front and back, I just eyeballed it. The tail fin is a couple of meters of organza doubled over and gathered on to the bottom, then pinched up at the points of the skirt.

The tail was joint effort, my idea wasn't going to work with material that frayed so much, Mark came up with the idea of pinching it up. It gives just the right effect of 'tail'.

So what was the verdict? After asking every morning if I'd made it yet, she was initially very upset that it wasn't a real tail(!) but soon got over it and has 'swimming' around the house for days.

 Even a mermaid has to snack, on the shell phone to her mermaid friends


Tuesday, 24 March 2015

dolls, dolls and more dolls

I had great fun over Christmas making these dolls. I love their felt hair and that there is a boy doll too. They were easy to make but I wanted Grace to be able to put the clothes on and off and the pattern didn't give much room for decent finishing on the seam allowance. Also I thought it was very remiss that it didn't come with knickers! Although that was easily fixed with a quick hack to the dungarees pattern. The little clothes are also a great way to use up some scraps from the stash.

Grace loves the red shoes with buttons and wants some herself. I think the next dress I make for her, the doll will have to have one too.


Sunday, 1 February 2015

stash

Operation 'reduce material stash to something reasonable' has begun.

Phase one: sort out stash and take several large curtains to a charity shop. I was never going to make anything out of them and maybe someone can use them as actual curtains.

Phase two: use lots of small pieces to make a new tea cosy. The old one had got a bit close to the stove and had a huge hole in.


Phase three: make untold meters of bias binding out of the piece of fabric I specifically bought for the purpose back in the summer. I am not sure if this counts as using up my stash or just moving it from one place to another.

I followed a Whipstitches tutorial to make one continuous piece, which is very cunning but would have been a whole lot easier with the right equipment. Like a nice quilters ruler* instead of the spirit level (it was the only thing long enough) and a fade out fabric pen that worked rather than chunky tailors chalk. It is a bit wobbly, but one meter of fabric made so much binding it took about half an hour to iron it all.
 *lucky for me lovely man bought me a quilting ruler for my birthday

warm trousers

Yet again I've used Rae's parsley pants pattern to make trousers for Grace. She requested 'warm fluffy' trousers. So what could be better than fleece?

I could knock these up in an hour if it wasn't for pockets, but I can't make trousers without pockets, where would she put all the stones?

Pining her down for photos is as usual tricky but you get the idea.


Friday, 11 July 2014

carried away

It was so easy to make the peasant dress that I made a top too. Another upcyled job from a pillow case and scraps from my stash. The pillow case wasn't quite wide enough so I cut the front and back pieces and added a panel. I had fun going through my stash for the right combination of fabrics.

To make it look a bit different from the dress I made puffed sleeves rather than gathered. Grace found some buttons in my bag of spares and wanted them on the dress, in fact she wanted them on the front and sleeves but it looked a bit over the top. 

I used my favourite flat fell seam to add the panels in the front and back and for the side seams. So far no pics of her in it yet, I may have to add those extra buttons.

getting my monies worth

There is something very satisfying about being able to make a whole item of clothing in an evening. This is probably why Grace has an overflowing wardrobe and I have only made my self one dress in the past half dozen years.

My latest favourite pattern is Sew Much Ado's Polly Peasant dress. I've free formed peasant dresses in the past, but sometimes it is just less work to use a pattern. It is such an easy pattern and came together so quickly I just had to add a large pocket.

The other satisfying thing about this dress is that it's completely up-cycled out of a sheet and the remains of 50p worth of pillow cases that I had fun making a top and trousers out of a couple of years ago. Looking back at the photos I can't believe how much she has grown.

I used a flat fell seam for the side seams, it's my new favourite seam. Supper easy and a much nicer finish than zigzagging raw edges. A double row of top stitching along the bottom hem just finished it off.

Grace likes it because she can put it on herself, and because it has a big pocket

Monday, 30 June 2014

shorts

I've had this material for a while. I knew I wanted to make something for Grace but I wasn't sure what. The material is a bit stiff so not really right for a dress. Then it occurred to me how good she looks in three quarter length trousers.

In my mind when I planed them they had coloured turn ups and pockets. In reality when I started them the other night, I got carried away with how easy the pattern is and forgot all about the embellishments!

They are based on Made by Rae's Parsley pants and I followed her Super Seams tutorial so they should be nice and hard wearing. So nice not to have zigzagged edges inside.

I have to say I am more than a little pleased with how well I lined up the pattern across the front!

Monday, 21 April 2014

another niece another baby book

It has taken me a while to write this as my new niece Ciara is now a couple of months old now. As usual I didn't have it done in time for her birth but I did manage to get it done a little quicker than Jaspers book.

Kind of a farm yard animal theme this time, I had fun with the pig and cow tails.

Sunday, 12 January 2014

trouser mad

I've gone a bit trouser made over the past few months. Grace has been growing fast and suddenly it was winter and she had no warm trousers that were long enough. I wanted a nice simple two piece trouser pattern and I know Rae makes some nice patterns so I bought her parsley pants pattern.

Now she does say it is a slim fitting pattern but Grace is pretty much in big girl pants now so I thought I be ok. The first pair I made are these lovely moleskin ones with pin tucks. Unfortunately the pin tucks just make them too narrow to get over her chubby thighs, even without nappies. They do fit but she complains they are tight.


I've had acres of the moleskin for ages and I am on a mission to use up some of my stash. It doesn't wash very well, as you can see but it is warm.

So the second pair had to be out of the moleskin too as it is so cozy. I couldn't bring my self to make a repeat pair, even though I love the pin tucks, so I went for different pockets. I added an extra inch to the width and they are a much better fit. It also made me happy that the pockets used up some small scraps.


The third pair are super cozy and made of fleece. In my mind I have huge amounts of fleece, but when I came to make these I realised that I don't have any big pieces any more. Which is why they have one orange leg at the back and orange cuffs. I might not have chosen to make them that way but I think they have turned out pretty funky, and did I mention they are so cozy!


The fourth pair are from Rae's big butt baby pants, another great pattern and super easy to make. I caved in and bought this fabric before Christmas, how could I refuse! These trousers are a Christmas present for my great nephew (penny if you are reading this close your eyes). He doesn't have them yet and he growing hugely, I hope they still fit when he gets them!

Monday, 9 December 2013

dolls

Grace loves her dolly so much and it was such fun to make, that I have made two more, one for Rose and one for Amelie Mei. Grace has called hers Thin Dolly, looking forward to hearing what the girls call theirs.


hat

I love this hat pattern by Rae, I just whipped up another for Grace and I'll do one for Rose too, matching hats for Christmas! It is such an easy pattern and so cozy. I am a bit short on fleece but I do have some of the plush fabric from Grace's dressing gown. I love the way the plush sticks out under the fleece, the only problem is that it sheds fluff everywhere.

Rae's pattern is easy but I used Zaaberriy's tip to get rid of the seam at the front. Hopefully I'll get photos of the girls wearing them at Christmas.

Sunday, 15 September 2013

dolly

I have had this lovely doll pattern for ages, long before I had a little girl. Grace loves dolls now so it seamed like the perfect time to make it. It was quite easy to make and lots of fun. I particularly like how her elbows and knees bend.
I made a few tweaks to make it more toddler proof like sewing the two flower hair pieces together before stitching them on.
And I embroidered the face rather than paint it. Which to be honest was a bit nerve wracking but I think has turned out ok. Also Grace loves to put on and take off clothes so I made her a proper skirt rather sew it on to her body.


Grace loves her, although so far she is just called dollllliiiiy!

Sunday, 28 July 2013

lavender bomb

I haven't made one of these in years, it's a nice way to make a pretty lavender bag and use up some ribbon.

You need an odd number of fresh, long lavender stems, I used nine. Pick them on a sunny day so the flowers dry. Tie them together to make bunch, shuffle them about so you get a longish bunch.

Fold the stalks back on them selves to make a cage over the flowers and even out the 'bars'.

Hold the stems quite firmly and start weaving the ribbon in and out of the stems. Do this by releasing one stem at a time, try not to bend the stems. Pull the ribbon quite tight, and keep the rows close together, you want to keep all the flowers in as they dry.


Keep going until you have covered all the flowers then tie off the ribbon.


Use another piece of ribbon for a bow and add a hanging loop if you want.


I used 8mm ribbon. If you use more stems and make a bigger bunch you might want to use a wider ribbon.

new trousers

I couldn't resist these picks of Grace enjoying her new trousers. Thanks to Mark for taking them, she is a hard one to take photos of, never keeps still for very long.

Monday, 8 July 2013

more tousers

To make up for buying yet more material I made Grace a pair of trousers out of a sheet, a duvet cover and some curtains. They were supposed to be a quick job but I got carried away with the pockets.

The pockets are lined and top stitched in to place. To give them a piped look I rolled the lining to the outside edge and pressed it so it showed.


dressing gown

I made an earlier promise to my self to work through my stash with out buying new material, so I was very pleased with my self for using an old towel to make Grace a new hooded towel and to make Bean a new body. So pleased that I brought some more material. I couldn't resist Dunelm Mills sale. They had fab striped snuggle blanket for £7.99 and at 177cm x 228cm it seamed like a good deal for lovely fabric.

I thought it would make a great dressing gown for Grace, her current one barely covers her bum. I also thought I would use the old one as a template. I normally avoid making things with sleeves and I know there are a lot more complexities to making patterns than I have experience with so I am not sure why I thought this was a good idea.

To make the pattern I traced around her old gown, adding 2.5cm for seam allowance plus a bit growing room. It was all a bit hit and miss and I definitely needed to make a paper pattern rather than my normal trick of tracing directly on to fabric. I used some old tissue paper which was thin enough to see my cutting board lines through, which made tracing straight lines easy. It was a bit too thin though and didn't hold up to being pinned on to fabric very well.

I wasn't sure how easy it would be to work with the fabric so I started with the belt. I made the belt in two pieces that are sewn in to the side seams. That way she can't loose the belt. To make them I sewed a tube, turned it right sides out and top stitched. A slightly longer stitch than normal seamed to work best. You can't see the stitches of the top stitching, it leaves a dent.

As the fabric is so soft on both sides I didn't want to line the hood. That meant I needed a nicely finished seam for the centre. To do this I sewed the hood pieces right sides together with about 3cm seam allowance then trimmed one side down. The longer seam allowance is turned under once and pined in place so it covers the short seam allowance. As I couldn't iron it, it was all done pretty much by feel. Then I top stitched, from the wrong side, as close to the folded edge as I could.

This gives a nice flat, neatly finished seam. Inside hood is on the left.

Sleeves can be tricky enough at the best of times without making small versions for childrens clothes. The advantage of this fabric is that being a knit, it is stretchy so I didn't need to worry about puckers in the sleeve. I thought the easiest way to make them was to stitch the shoulder seam, then put the sleeve in. I pinned from the centre out, right sides together. Once that was done I sewed the the side seam (with the belt pinned in) all the way up to the armpit and along the sleeve.
It was at this point I realised that I had made the back far too wide.Even allowing for some growing room it was too much. I really didn't feel like unpicking the sleeves and cutting a new back so that meant taking the back in. Although the fabric didn't fray it did need zigzagging on the raw edges. I thought that was going to look terrible, instead of cutting I just made a big fold and stitched up both sides. It ended up looking like the inside of the hood. It is a bit bulky but at least the fabric is soft.

Next I sewed the hood on to the neck. I am happy with the side seams and arms being zigzagged but the back of the neck needed to look and feel more comfortable. I trimmed the seam allowance down and covered it with a nice soft piece of satin bias tape.

To finish the front I folded over a nice wide hem all the way round the front of the gown and the hood. The hem covered the ends of the bias tape. It took a bit of fiddling and trimming to get it right. I folded the same size hem around the bottom and stitched both with a double row of top stitching. Grace likes pockets so I made two large patch pockets on the front.


I'd love to have photos of Grace in her new gown, but she refuses point blank to wear it. Oh well, it's plenty big enough so I'm hoping she grow to like it at some point.