Thursday 9 December 2010

chicken

With a baby on the way for the family I have got carried away looking at all the fab things I can make for babies. I was looking for a stuffed toy pattern and when I cam across this chicken I knew it was the one! It is by Melly and Me and was an easy enough pattern to follow but rather fiddly. I think next time I'll make the chicks wings bigger. In fact I might make the chicks slightly bigger in general as I now know how much my god daughter likes sucking the chicks!

I had great fun looking through my now colour co-ordinated fabric as I knew I wanted all the chicks to be different. Since making the first baby book I have had an urge to sort all my material by colour. I finally acted on it the other day which made choosing the fabrics so much easier.


another baby book

After the success of the first baby book (that my fabulous god daughter just loves) I was waiting for an excuse to make another. Luckily my sister has provided me that excuse. As we don't know what the new baby will be I decided to go for an underwater/beach theme this time. I came up with some nice simple fish designs but it turns out that octopus are not easy to draw! And then to complicate it further I wanted to have parts of the book that you could lift up, including two of the octopus legs.

To make the parts that lift up, I stiffened both sides with interfacing, cut the shapes out bigger than I needed then marked out the shape. The shapes were put together right side out, I followed the shape with the zig zag stitch then trimmed it back to the stitching.

The octopus was made in several parts so the legs could overlap.


Thursday 4 March 2010

baby book

A good friend is having a baby girl soon. I don't see her much as she doesn't live in the country so I wanted to take her something that was pretty and useful. I have bags of lovely material and have had a hankering to do something with it and this seamed like the perfect excuse.

I wanted to make a fabric book, using lots of different fabrics and textures and thought a combination of crazy patch work and appliqué would work well. I sketched some ideas for the pages and what textures they could include. Then sketched up some ideas of how to put it all together.

Never having made anything like this I wanted to see how other books were made. Using the magic of google image search and cooliris I searched through lots of photos and finalized a design that would work with the fabric and batting that I had.

I wanted to keep the book simple, outside front and back cover, inside covers and four more internal pages. The cover and internal pages were made the same way, one large rectangle of material and two square pieces. The page designs were appliquéd on first then two squares were laid side by side onto the rectangle and sewn on the three out side edges and turned inside out through the center. I hand sewed the center seam.

I made the cover first, mostly as that was what I had the clearest idea of how to make. I covered the large rectangle with crazy patchwork and padded the whole thing so it would be nice and thick. The handle was stiffened with interfacing along with the the appliqué shapes and some of the shapes were also padded with Kapok. The handle was stitched into the seam of the cover so it would be nice and strong. To finish it off I used an embroidery machine stitch to top stitch the outer edges. I used the same colour for all the pages to give the book a cohesive overall feel.

The internal pages were made the same way but without the batting, instead I stiffened all the background material with interfacing. I sketched up some ideas for the internal pages but the time consuming bit was searching for just the right fabric. In fact the back room was an explosion of fabric, ribbons and lace for several days.

The book was sewn together with the rough central seams facing so they were hidden. I made two lines of stitching either side of the centre to give it a nice thick spine, making sure I didn't catch the handle on the out side!


Saturday 13 February 2010

quick valentine

Not that this in any way reflects my feelings, just that I was very short of time and he was about to leave work!

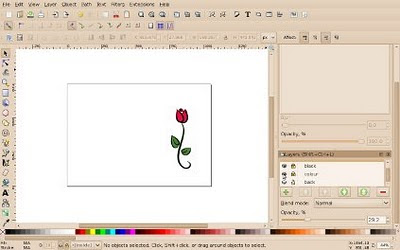
I wanted a simple shape that I could use as a background and as the main part of the card. I also wanted to play with new spiro spline tool in Inkscape. The tool lets you make nice curves that are easy to work with and make smoother curves than the beizer tool.

First open an A4 landscaped document and make a simple outline of a rose with the pencil tool using spine set to ellipse. This gives a nice thick/thin curved line. I tweaked the lines a little by editing the nodes. Position the rose roughly where you want it on the page, the A4 page will folded in half to make the card.


Make a new layer below the black line. Draw basic shapes using the pen tool and tweak the nodes to make shapes that deliberately go slightly outside the black lines. Then fill the shapes with a gradient. For the stem copy the black stem, fill it with the green gradient you made for the leaves and off set it slightly.


Make a new layer above the black lines. Group all the black outlines and copy them to the new layer. Arrange them across the rest of the page with some bleeding off the edge. I knew that I wanted to print the outlines on red card, select them all and make them the darker red of the gradient.


By turning the layers on and off, print the coloured layer and outlines on a textured cream card and the background only on the red card. So the red outlines to bleed off the card you'll need to trim the card slightly as printers doesn't print right up to the edge.


Cut the cream card to fit, put some foam tabs on the back so it will be raised and finish it with some ribbon.