I have been meaning to change the look this blog for ages but I had made life difficult for my self with it's first incarnation. I wanted rounded corners on the photos and ended up doing it manually in the Gimp by adding rounded corners and filling with the background colour of the blog. This meant that any change would either mean keeping the dark green background, which I wanted to get rid of, or re-doing all of the photos - all together too much faff.
In the end I modified this template to give me a green boarder and Mark helped me to get the nice rounded corners with a very small tweak of the CSS. Rest of the colours are taken from the photo.
Now I have more space I can have nice large photos. The older posts are not laid out as well as I'd like because I uploaded small photos but don't have the time or willingness to sort that out!
I like the new brighter look, it's just a shame the photo of the ribbon is not mine... I'll work on that for the next overhaul.
Showing posts with label computer. Show all posts
Showing posts with label computer. Show all posts
Monday, 29 October 2012

Saturday, 13 February 2010
quick valentine
Not that this in any way reflects my feelings, just that I was very short of time and he was about to leave work!
I wanted a simple shape that I could use as a background and as the main part of the card. I also wanted to play with new spiro spline tool in Inkscape. The tool lets you make nice curves that are easy to work with and make smoother curves than the beizer tool.
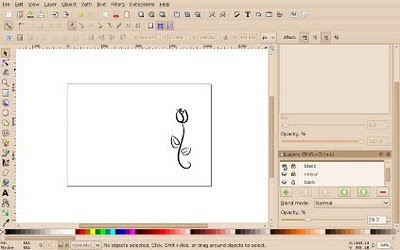
First open an A4 landscaped document and make a simple outline of a rose with the pencil tool using spine set to ellipse. This gives a nice thick/thin curved line. I tweaked the lines a little by editing the nodes. Position the rose roughly where you want it on the page, the A4 page will folded in half to make the card.
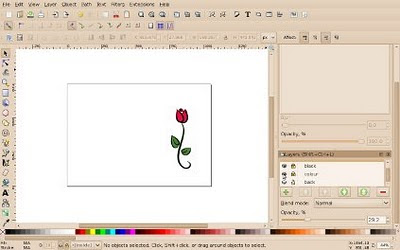
Make a new layer below the black line. Draw basic shapes using the pen tool and tweak the nodes to make shapes that deliberately go slightly outside the black lines. Then fill the shapes with a gradient. For the stem copy the black stem, fill it with the green gradient you made for the leaves and off set it slightly.
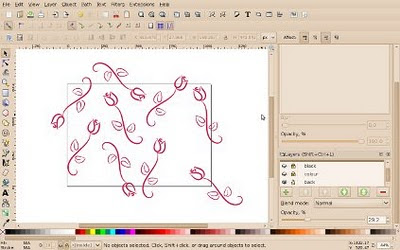
Make a new layer above the black lines. Group all the black outlines and copy them to the new layer. Arrange them across the rest of the page with some bleeding off the edge. I knew that I wanted to print the outlines on red card, select them all and make them the darker red of the gradient.
By turning the layers on and off, print the coloured layer and outlines on a textured cream card and the background only on the red card. So the red outlines to bleed off the card you'll need to trim the card slightly as printers doesn't print right up to the edge.

Cut the cream card to fit, put some foam tabs on the back so it will be raised and finish it with some ribbon.

I wanted a simple shape that I could use as a background and as the main part of the card. I also wanted to play with new spiro spline tool in Inkscape. The tool lets you make nice curves that are easy to work with and make smoother curves than the beizer tool.
First open an A4 landscaped document and make a simple outline of a rose with the pencil tool using spine set to ellipse. This gives a nice thick/thin curved line. I tweaked the lines a little by editing the nodes. Position the rose roughly where you want it on the page, the A4 page will folded in half to make the card.

Make a new layer below the black line. Draw basic shapes using the pen tool and tweak the nodes to make shapes that deliberately go slightly outside the black lines. Then fill the shapes with a gradient. For the stem copy the black stem, fill it with the green gradient you made for the leaves and off set it slightly.

Make a new layer above the black lines. Group all the black outlines and copy them to the new layer. Arrange them across the rest of the page with some bleeding off the edge. I knew that I wanted to print the outlines on red card, select them all and make them the darker red of the gradient.

By turning the layers on and off, print the coloured layer and outlines on a textured cream card and the background only on the red card. So the red outlines to bleed off the card you'll need to trim the card slightly as printers doesn't print right up to the edge.

Cut the cream card to fit, put some foam tabs on the back so it will be raised and finish it with some ribbon.

Subscribe to:
Posts (Atom)