Showing posts with label Inkscape. Show all posts

Wednesday, 21 November 2012

handmade lables

I've been thinking about making some handmade labels for my sewing projects. I wanted something professional looking but easy to make. I thought I'd try out some transfer paper for inkjet printers.

I made the design in Inkscape so I could draw the flower and adjust the text how I wanted. I printed several designs on plain paper to get a feel for how they would look. At first I had coloured flowers but I'm glad I went with black and white.

I made the label specifically to fit on some white ribbon. First time round forgot to reverse the design before I printed it so the text was backwards. My fault for not reading the instructions! The transfer leaves a white backing over the whole area which  is a bit of a shame but that's not noticeable when they sewn in.

Saturday, 10 March 2012

full of Grace

Grace has a cold and has not been able to sleep, the only way she's been able to get a decent amount of sleep is with one of us holding her. So I have been designing dresses for her and writing blog posts in my mind while I sit in the dark listening to her sound like Darth Vader. This is one of the posts and if she ever sleeps more than 20mins in one go again I might make one of the dresses.

I realized that I posted this on flickr but not here. For most of my pregnancy I kept saying how much I wanted photos of my new voluminous body but somehow never got round to taking many. In the end, I grabbed the tripod, found the remote and snapped a few pics. They are nothing to write home about, poor light and against a plain wall. But I am glad I took them, as two days later Grace was born.

I wanted to use the photos to do something that celebrated my pregnancy. For nine months I watched in fascination as my body changed, then one day (in my case 6 days earlier than I was expecting) I had a little dark eyed bundle in my arms and I was no longer pregnant with no time to acknowledge that passing. I was blessed with an easy pregnancy and thoroughly enjoyed it, perhaps it is because I'm unlikely to be pregnant again that I don't want to forget it.

I've used this inkscape technique before. I used to do pictures like this with actual cut out paper when I was younger so it appeals to me. I tried out lots of different colour combinations, which is much easier to do in Inkscape than in with real paper, I like the heavily textured blue paper but it is far too distracting.
One day I might use the files to craft robo the actual paper and make the real thing!

Saturday, 13 February 2010

quick valentine

Not that this in any way reflects my feelings, just that I was very short of time and he was about to leave work!

I wanted a simple shape that I could use as a background and as the main part of the card. I also wanted to play with new spiro spline tool in Inkscape. The tool lets you make nice curves that are easy to work with and make smoother curves than the beizer tool.

First open an A4 landscaped document and make a simple outline of a rose with the pencil tool using spine set to ellipse. This gives a nice thick/thin curved line. I tweaked the lines a little by editing the nodes. Position the rose roughly where you want it on the page, the A4 page will folded in half to make the card.


Make a new layer below the black line. Draw basic shapes using the pen tool and tweak the nodes to make shapes that deliberately go slightly outside the black lines. Then fill the shapes with a gradient. For the stem copy the black stem, fill it with the green gradient you made for the leaves and off set it slightly.


Make a new layer above the black lines. Group all the black outlines and copy them to the new layer. Arrange them across the rest of the page with some bleeding off the edge. I knew that I wanted to print the outlines on red card, select them all and make them the darker red of the gradient.


By turning the layers on and off, print the coloured layer and outlines on a textured cream card and the background only on the red card. So the red outlines to bleed off the card you'll need to trim the card slightly as printers doesn't print right up to the edge.


Cut the cream card to fit, put some foam tabs on the back so it will be raised and finish it with some ribbon.

Wednesday, 4 February 2009

Inkscape paper portrait

When I was younger I used to make pictures by cutting it out of layers of coloured paper instead of using crayons or paints. I've been scanning all my pretty papers and decided to try out the same idea using Inkscape instead of scissors.

By using the trace bitmap function in Inkscape the picture is broken down into layers that can be "cut out" of scanned paper.

The first thing is to find a nice picture, you want some shadows but not big areas of dark shadow. To make the finished picture clearer remove the background, I used the Gimp for this. Then open the picture in Inkscape.
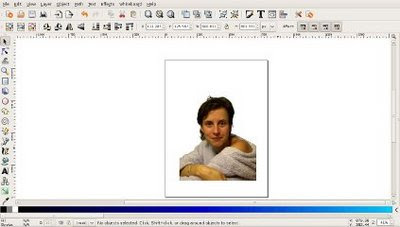

With the pictures selected, go to the path menu, and choose trace bitmap. This will bring up a new window, chose brightness steps, make the scans 4, check smooth and stack scans. Click update for a preview and ok when you are happy it.
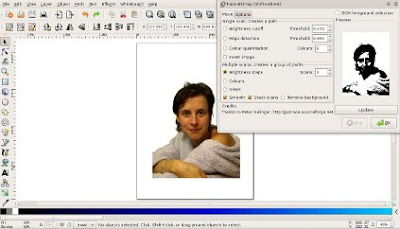

You will now have a new set of black and white layers on top of your photo. Click un-group, then separate the layers. You can delete the photo if you want or just move it to one side.
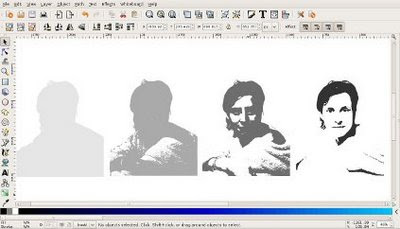

Open the first paper that you will use for the darkest layer (obviously make this a dark coloured paper!) and put it over your darkest scan. Your paper needs to be below the scan so click page down to lower it.
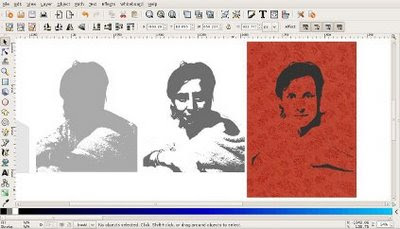

Select both the scan and the paper, then go to the object menu, clip, set. You'll now have your scan cut out of the paper.
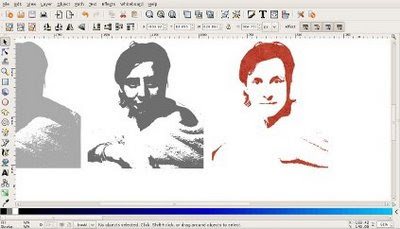

Do this for all of your scans.
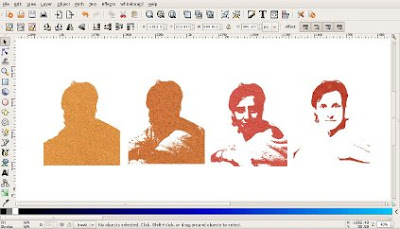


Put all the layers back on top of each other in the right order, darkest on top. Then to align them easily select all of your scans, then open the align dialogue box by going to the object menu, and choosing align. Make sure you have relative to: selection chosen. Choose centre on vertical axis and then align tops to get all the scans aligned.
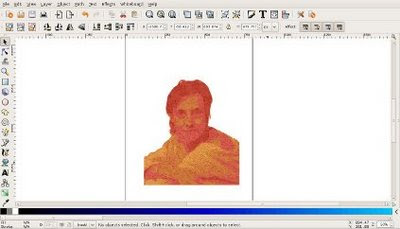

Select all the scans and group them together. To finish the picture I used another paper for the background and made a frame. For the frame, make a rectangle of the size you want, turn off the fill and make a thick stroke, I chose 40px. To give the frame some interest I filled it with a gradient.

To make the inside shadow copy the frame and move the copy to one side so you can see what you are doing. Duplicate the frame then change the colour of the new frame to black. Blur the new black frame by about 8%.
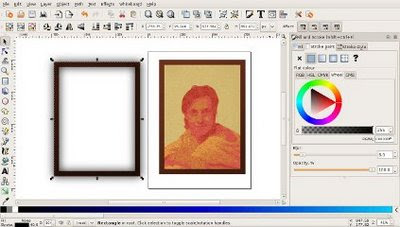

Lower the blurred frame to the bottom by clicking page down, then with both frames selected, go to object, clip, set.
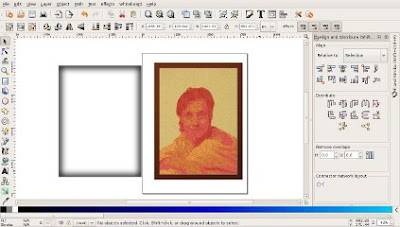


Now align the shadow with the frame, do this by hand, bringing the shadow up above the picture and background layers if necessary...

...and there you have it!